
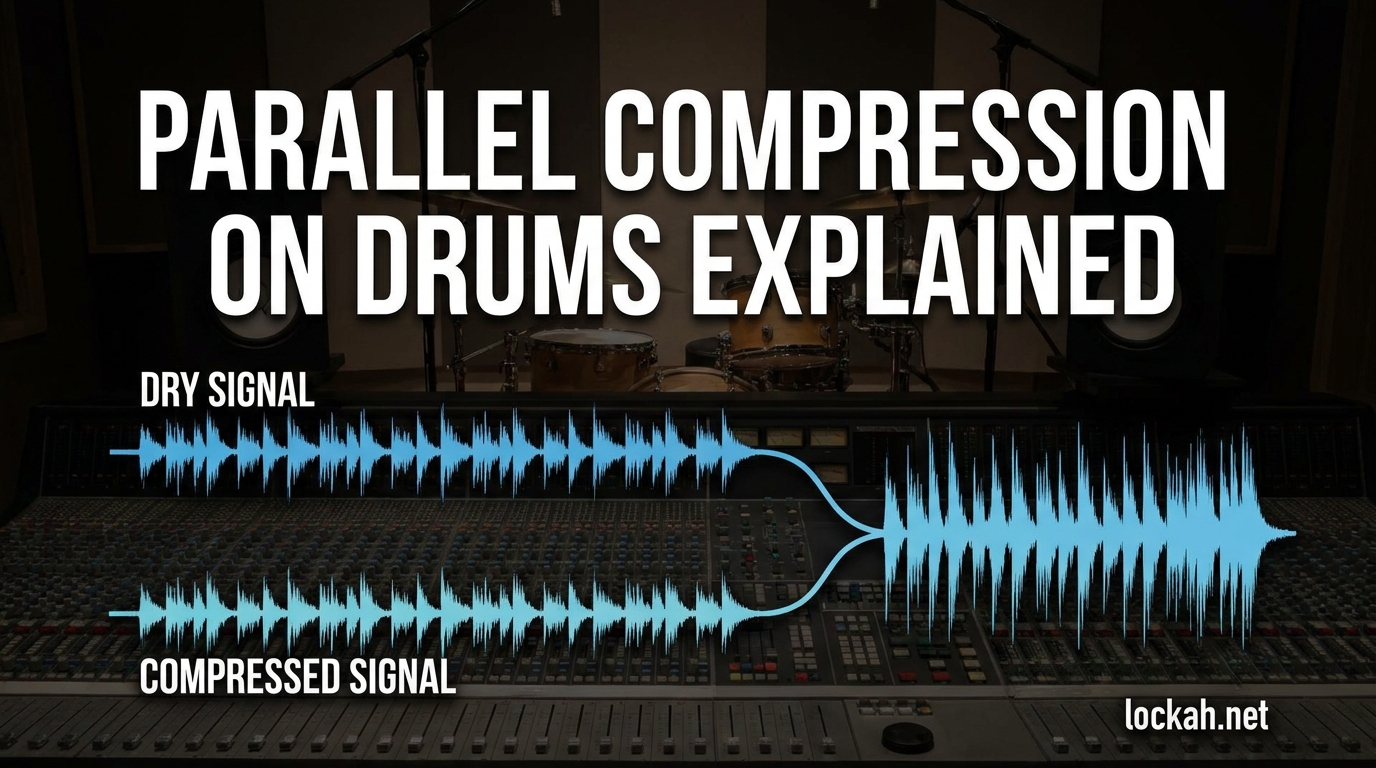
Parallel compression on drums explained simply: it is the technique that lets you add explosive power and sustain to your drum tracks without sacrificing the punch and transients that make drums cut through a mix. I remember the first time I tried it on a snare drum. The track went from thin and weak to thick and authoritative in about 30 seconds. That is the magic of parallel compression, and by the end of this guide, you will understand exactly how to use it in your own mixes.
In this comprehensive guide to parallel compression on drums, you will learn what parallel compression actually is, how it differs from normal compression, three different ways to set it up in your DAW, specific settings for kick and snare, and advanced techniques the pros use. Whether you are a beginner trying to understand the concept or an intermediate producer looking to refine your technique, this guide has you covered.
Table of Contents
What Is Parallel Compression on Drums?
Parallel compression is a mixing technique where you create a duplicate of your drum signal, apply aggressive compression to that duplicate, then blend the compressed signal back in with the original uncompressed signal. The result is a drum sound that maintains the natural attack and transients of the original while gaining the body, sustain, and perceived loudness of the heavily compressed version.
The technique goes by several names. You might hear it called New York compression because it was popularized by engineers in New York City during the 1980s and 90s. Some call it blend compression because of how you blend the dry and wet signals together. Others refer to it as squash compression because of how hard you squash the parallel signal. All these terms describe the same fundamental approach.
To understand parallel compression, you need to grasp the dry signal versus wet signal concept. The dry signal is your original uncompressed drum track. It has all the natural punch, snap, and transient information. The wet signal is the parallel path where you apply heavy compression. This wet signal loses most of its transients but gains substantial body and sustain. When you blend them together, you get the best of both worlds.
The key insight that makes parallel compression work is that the uncompressed dry signal maintains control over the initial attack. Even if the compressed signal has a slow attack time, the dry signal provides the snap. Even if the compressed signal has fast attack that kills transients, the dry signal preserves them. This is why parallel compression sounds so powerful yet natural.
Parallel Compression vs Normal Compression: What’s the Difference?
Normal compression, also called serial compression or insert compression, processes your entire signal through the compressor. Every sound that passes through gets affected by the threshold, ratio, attack, and release settings you choose. If you set a fast attack time, you lose transients on the entire signal. If you set a high ratio, you reduce dynamic range across the whole track.
Parallel compression takes a different approach. You keep your original signal completely untouched. Then you create a parallel path where you can be as aggressive as you want with compression. The original signal provides the natural dynamics and transients. The parallel path provides the crushed, sustained, thick character. You blend them together to taste.
Think of it like making a cocktail. Normal compression is like trying to create the perfect drink by mixing ingredients in one glass and hoping the balance works. Parallel compression is like having two separate glasses, one with pure spirit and one with a mixer, then combining them until the taste is exactly right. You have complete control over the balance.
Here is a practical way to think about the difference. With normal compression on drums, you are constantly fighting between preserving the crack of the snare and controlling the overall level. Set the attack too fast and the snare goes thud instead of crack. Set it too slow and the level jumps around too much. Parallel compression eliminates this compromise. The dry signal gives you the crack. The wet signal gives you the controlled level. You blend to find the sweet spot.
Another key difference is how each technique affects the dynamic range. Normal compression reduces dynamic range by bringing down the loudest peaks. Parallel compression can actually increase the perceived dynamic range in an interesting way. The dry signal maintains the full peak-to-average ratio, while the wet signal raises the average level. The result is something that hits harder yet sounds more consistent.
How to Set Up Parallel Compression on Drums?
There are three main methods to set up parallel compression in your DAW. Each has advantages and disadvantages depending on your workflow and the specific DAW you use. I will walk you through all three methods step by step.
Method 1: Aux Send and Return Track (Recommended)
This is the most flexible and professional approach. You use your DAW’s send system to route audio from your drum tracks to a parallel compression bus. This method is non-destructive, allows easy level adjustments, and works identically across all major DAWs.
Step 1: Create a new aux track or return track in your DAW. Name it clearly, something like Drum Parallel Compression or Drum Crush.
Step 2: Insert your compressor of choice on this aux track. Set it up for aggressive compression, which we will detail in the settings section below.
Step 3: On your drum tracks or drum bus, create a send to this aux track. In most DAWs, you do this by enabling a send and selecting your parallel compression track as the destination.
Step 4: Set the send to pre-fader rather than post-fader. This is important because it means the send level stays constant even if you adjust the main drum fader. The parallel compression remains consistent regardless of your drum level changes.
Step 5: Start with the send at unity gain or 0dB. Play your track and adjust the fader on your parallel compression track to blend the compressed signal in with your main drums. Usually you want the parallel track much lower than the dry signal, often between -15dB and -6dB relative to the dry signal.
The aux send method gives you maximum control. You can easily automate the parallel track level. You can insert EQ after the compressor to shape the parallel signal separately. You can even create multiple parallel buses with different compressors and blend them all together.
Method 2: Duplicate Track
This method is more straightforward for beginners and works well if you prefer to see everything as separate tracks rather than using sends. It uses more CPU since you are duplicating the audio, but modern computers handle this easily.
Step 1: Duplicate your drum track or drum bus. In most DAWs, you can right-click the track and select duplicate or copy the track and its contents.
Step 2: On the duplicate track, insert an aggressive compressor. Set it up the same way you would for the aux method.
Step 3: Lower the fader on your duplicate track significantly. Start around -15dB or lower.
Step 4: Play the track and bring up the duplicate track fader until you hear the drums thicken up without losing the natural attack from the original track.
The duplicate track method is visually clear and easy to understand. You can see both tracks in your mixer. However, it clutters your session with extra tracks, and any edits to the original drum track need to be mirrored on the duplicate.
Method 3: Plugin Mix/Dry Knob
Many modern compressors include a mix or dry/wet knob that lets you do parallel compression inside a single plugin instance. This is the fastest method and uses the least CPU.
Step 1: Insert your compressor directly on the drum track or drum bus as a normal insert.
Step 2: Set the compressor for aggressive settings with high ratio and low threshold.
Step 3: Find the mix, blend, or dry/wet control in the plugin. Set it to 100% wet initially to hear what the compression is doing.
Step 4: Adjust the mix control to blend in the dry signal. Usually a setting between 10% and 30% wet works well for parallel compression on drums.
The plugin mix method is convenient but less flexible than the aux send approach. You cannot EQ the compressed signal separately from the dry signal. You cannot easily automate just the compressed portion. However, for quick results and saving CPU, it works great.
Best Parallel Compression Settings for Drums (2026)
Now let us talk specific numbers. These settings are starting points based on what works for most drum material. Always use your ears and adjust for your specific tracks.
Threshold Settings
Set your threshold low enough to get significant gain reduction. For parallel compression, you want the compressor working hard. Aim for 10dB to 15dB of gain reduction on the loudest drum hits. Do not be afraid to push it to 20dB if needed. Remember, this is the parallel signal that you will blend in gently, so aggressive compression here translates to subtle but powerful results in the final blend.
Ratio Settings
Use high ratios for parallel compression. Ratios between 8:1 and 20:1 are common. Some engineers even use limiting ratios of 100:1 or higher. The high ratio ensures that the compressed signal has a very controlled, consistent level. It creates that thick, sustained character that parallel compression is known for.
For a punchy, aggressive sound, try 12:1. For maximum sustain and density, try 20:1 or higher. Some classic hardware units like the 1176 are known for their all-buttons-in mode that creates extreme limiting, which works beautifully for parallel drum compression.
Attack Time Settings
Attack time depends on what you want to emphasize. Fast attacks between 10 and 30 microseconds let the compressor clamp down immediately, creating maximum sustain and body but removing punch. This works well for adding weight to thin-sounding drums.
Medium attacks around 1 to 5 milliseconds let some transient through while still providing significant compression. This is a good general-purpose setting for parallel drum compression.
Slower attacks above 10 milliseconds let most of the transient through untouched. The compressor mainly affects the sustain portion of the drum sound. This preserves maximum punch while still adding body.
Release Time Settings
Release time shapes how the compressed signal pumps and breathes. Fast releases below 50 milliseconds create an aggressive, pumping sound that can add excitement and energy. This works well for rock and electronic genres.
Medium releases between 50 and 150 milliseconds provide a natural decay that matches most drum sounds. This is the safest starting point for beginners.
Slower releases above 200 milliseconds create a smoother, more sustained character with less pumping. This can help drums sit more consistently in a dense mix.
Makeup Gain
Set makeup gain so the compressed signal is at a healthy level. You want it loud enough to contribute meaningfully when blended, but not so loud that it overwhelms the dry signal. Usually you will add 6dB to 12dB of makeup gain to compensate for the heavy compression.
Quick Reference Settings Table
For punchy, aggressive drums: Threshold at -20dB, Ratio at 12:1, Attack at 1ms, Release at 50ms.
For sustained, thick drums: Threshold at -25dB, Ratio at 20:1, Attack at 30 microseconds, Release at 100ms.
For natural, subtle enhancement: Threshold at -15dB, Ratio at 8:1, Attack at 5ms, Release at 80ms.
Parallel Compression for Individual Drum Elements
Different drums respond differently to parallel compression. Here is how to approach each element of your drum kit.
Kick Drum
The kick drum benefits greatly from parallel compression. The technique adds weight and thump while preserving the beater attack that provides clarity and punch.
For kick drums, try aggressive settings. High ratio, fast attack, and medium release work well. The goal is to create a compressed signal that is mostly low-end thump and sustain. When blended with the dry kick, you get the best of both worlds: the attack cuts through, and the body fills out the bottom end.
If your kick lacks weight, emphasize the low frequencies on your parallel compression bus with EQ. A gentle boost around 60Hz to 80Hz on just the parallel channel can add significant perceived power without muddying the dry signal.
Snare Drum
The snare drum is perhaps the most common application for parallel compression. It is where the technique truly shines. The dry snare provides the crack and snap. The parallel compressed signal provides the body and sustain that makes the snare sound big and expensive.
For snare, use very aggressive compression on the parallel channel. 1176-style FET compressors excel here. Set the attack to medium-fast to let the crack through, or set it fast if you want a fatter, more controlled sound. Use a medium release to let the snare ring naturally.
Many engineers add EQ to the parallel snare channel, boosting around 200Hz for body and 2kHz to 5kHz for presence. This shapes the compressed signal to fill in exactly what the dry snare might be missing.
Toms
Toms can benefit from parallel compression but require a lighter touch. Toms have natural decay that you want to preserve. Too much parallel compression can make toms sound unnatural or tubby.
Use moderate settings on toms. Threshold for 6dB to 10dB of gain reduction. Medium ratio around 4:1 to 8:1. This adds fullness without destroying the natural musical decay of the tom rings.
Overheads and Room Mics
Overhead and room microphones capture the cymbals and the overall kit sound. Parallel compression on these can add excitement and size to the drum sound as a whole.
Be careful with cymbals. Aggressive compression can bring up the cymbal bleed and create harshness. Use gentler settings than you would for close mics. Focus on adding body to the room sound rather than crushing the overheads.
Some engineers create a dedicated room mic parallel compression bus that they blend in subtly. This can make drums sound like they were recorded in a bigger, more expensive room.
Best Compressor Types for Parallel Drum Compression (2026)
The type of compressor you use for parallel processing matters. Different designs impart different characters to the sound.
FET Compressors
FET compressors like the Urei 1176 and its many clones are the classic choice for parallel drum compression. They are fast, aggressive, and add a distinctive color that many describe as punchy or energetic.
The 1176 in particular has an all-buttons-in mode where all four ratio buttons are pressed simultaneously. This creates a unique limiting behavior with extreme compression and interesting harmonic distortion. It is a secret weapon for parallel drum processing heard on countless rock and pop records.
FET compressors work best when you want obvious punch and character. They are less subtle than other types but can transform weak-sounding drums into powerful, aggressive tracks.
VCA Compressors
VCA compressors like the SSL G-Master Buss Compressor offer cleaner, more transparent compression with excellent punch. They are a staple of parallel drum bus processing in modern mixing.
The SSL bus compressor sound is tight, controlled, and punchy. It adds density without obvious coloration. Many engineers use this style on their drum bus parallel compression for consistent, professional results.
VCA compressors are versatile and predictable. They work well for any genre and are particularly good when you want the parallel compression to add power without obvious sonic character.
Optical Compressors
Optical compressors like the LA-2A provide smooth, musical compression that works differently from FET or VCA designs. They are slower and more program-dependent, creating a natural, flowing sound.
While less common for aggressive parallel drum compression, optical compressors excel at adding sustain and body without harshness. They can be perfect for softer genres or when you want the drums to feel more organic rather than punchy.
Modern Plugin Options
Today you have access to emulations of all these classic designs plus modern digital compressors with unique features. Some popular choices include the Waves CLA-76 for FET character, the Waves SSL G-Master for VCA punch, and the FabFilter Pro-C 2 for transparent control.
The best compressor for parallel drums is the one that gives you the character you want. Try different types and learn what each brings to your drum sound.
Advanced Parallel Compression Techniques
Once you understand the basics, these advanced techniques can take your drum mixes to the next level.
EQ on the Parallel Channel
Adding EQ after your parallel compressor is a game-changing technique that many professional engineers use. The EQ shapes what the compressed signal contributes to the blend.
Try high-pass filtering the parallel channel around 100Hz to 150Hz. This prevents the compressed signal from adding mud to the low end while still contributing mids and highs. The result is cleaner, more focused drum enhancement.
Alternatively, boost the low mids around 200Hz to 400Hz on the parallel channel. This adds body and thickness to the drums without affecting the clarity of the dry signal.
Some engineers boost high frequencies on the parallel channel to add sparkle and presence. This can help drums cut through a dense mix without making the overheads harsh.
Saturation and Distortion
Adding saturation or distortion to your parallel compression chain can create exciting harmonic content that makes drums sound bigger and more aggressive.
Try inserting a tape saturation plugin or a subtle distortion effect after the compressor on your parallel bus. The distortion adds edge and excitement that pure compression cannot achieve.
This technique is particularly effective for rock, metal, and electronic genres where aggressive drum sounds are desired. Even subtle saturation can add perceived loudness and presence.
Multiple Parallel Buses
Who says you can only have one parallel compression bus? Many top engineers use multiple parallel paths with different compressors and blend them all together.
For example, you might have one parallel bus with an 1176 for aggressive punch, another with an SSL for tight control, and a third with an LA-2A for smooth sustain. Each contributes something different to the final drum sound.
This approach requires careful balancing but gives you incredible control over the drum character. You can automate the different parallel sends to change the drum sound between verse and chorus.
Automation of Parallel Sends
Static parallel compression sounds good, but dynamic parallel compression sounds professional. Try automating your parallel send levels throughout the song.
You might increase the parallel send during choruses when you want the drums to hit harder. You might reduce it during verses for a more intimate, natural sound. You might automate it on individual drum fills to add excitement.
This technique takes more time but adds life and movement to your mix. The drums breathe with the song rather than sitting at one static level.
Phase Issues and How to Avoid Them
Phase issues are a common concern when discussing parallel compression. The worry is that combining the dry and compressed signals might cause phase cancellation and thin out the sound.
In practice, phase issues are rarely a problem with proper setup. Modern DAWs handle plugin latency compensation automatically, keeping all signals time-aligned. When using the aux send method or plugin mix knob, you should not experience phase problems.
If you are duplicating tracks manually, make sure your DAW is compensating for any latency introduced by the compressor. Most DAWs do this automatically. If you hear thinness or flanging when blending the signals, check your delay compensation settings.
Some engineers intentionally use phase to shape the sound. The Little Labs IBP and similar plugins let you adjust the phase relationship between dry and wet signals to find the most constructive combination. This is an advanced technique but can yield interesting results.
Frequently Asked Questions
Should you use parallel compression on drums?
Yes, parallel compression is one of the most effective techniques for drum mixing. It adds body, sustain, and perceived loudness while preserving the natural transients that make drums punchy. It works on individual drums like kick and snare, on drum buses, and across all genres from rock to pop to electronic music.
Why does parallel compression sound so good?
Parallel compression sounds good because it combines the best attributes of compressed and uncompressed audio. The dry signal maintains natural transients and dynamic range while the wet signal provides consistent level, body, and sustain. This blend creates drums that hit hard yet sound full and controlled.
What compressor is best for parallel compression?
FET compressors like the 1176 and VCA compressors like the SSL G-Master are the most popular choices. FET compressors provide aggressive punch and character. VCA compressors offer clean, tight control. Both work excellently for parallel drum compression depending on the sound you want.
Can parallel compression cause phase issues?
Parallel compression rarely causes phase issues when set up correctly. Modern DAWs automatically compensate for plugin latency. Use the aux send method or plugin mix knob to avoid problems. If duplicating tracks manually, ensure delay compensation is enabled in your DAW settings.
Is parallel compression necessary?
Parallel compression is not strictly necessary but it solves a common mixing problem that is difficult to address otherwise. It provides a unique combination of punch and consistency that normal compression cannot achieve. Many professional mixers consider it an essential technique for drum mixing.
What are strong settings for parallel compression?
Strong parallel compression settings include threshold at -20dB to -25dB, ratio at 12:1 to 20:1, fast attack at 10 to 30 microseconds, and medium release at 50 to 100 milliseconds. Aim for 10dB to 15dB of gain reduction on the parallel channel, then blend it in subtly with the dry signal.
Does Andy Wallace use parallel compression?
Yes, Andy Wallace is known for using parallel compression extensively on drums. He often uses heavily crushed compression with 1176 compressors or SSL G-Series bus compressors blended in with the dry drum tracks. This technique contributes to his signature punchy, powerful drum sound heard on countless rock and metal records.
How much parallel compression should you use?
Start with the parallel track at around -15dB relative to the dry signal and adjust to taste. The compressed signal should be subtle when soloed but make a noticeable difference when blended in. If you can obviously hear the compression effect, you have likely added too much. Aim for enhancement, not obvious processing.
Conclusion
Parallel compression on drums explained comes down to this simple principle: blend a heavily compressed version of your drums with the original uncompressed signal to get punch and power simultaneously. The technique has been a studio secret since the days of New York compression in the 1980s, and now you understand exactly how to use it.
You have learned three ways to set up parallel compression in your DAW, specific settings for different drum elements, which compressor types work best, and advanced techniques like EQ on the parallel channel and automation. Start with the aux send method and the recommended settings in this guide. Adjust to taste for your specific tracks.
The best way to learn parallel compression is to practice. Set it up on your next drum mix and experiment with different blend levels. Pay attention to how it affects the transients, the body, and the overall impact of your drums. With time, parallel compression will become an essential part of your mixing workflow, giving your drums the professional polish they need to compete with commercial releases.