
I remember the day I decided to start my first podcast. I had a topic, a co-host, and endless enthusiasm. The one thing I did not have was a clue about what microphone to buy. Like most beginners, I spent weeks going down rabbit holes, reading forum threads, and watching comparison videos trying to figure out which mic would make my voice sound professional without draining my entire budget.
Here is the good news: you do not need to repeat that process. Our team has tested and researched dozens of microphones specifically for people just starting their podcasting journey. Whether you are recording in a spare bedroom with zero acoustic treatment or a dedicated corner of your home office, there is a microphone on this list that will work for your voice, your room, and your wallet. This guide covers the best podcast microphones for beginners in 2026, with picks for every budget and recording situation.
Before we jump into the recommendations, let me address something that confuses most newcomers. You will see two main types of microphones mentioned throughout this guide: dynamic and condenser. Dynamic microphones are less sensitive to background noise, making them ideal for untreated rooms with echoes, fans, or traffic sounds. Condenser microphones capture more detail and wider frequency ranges, but they also pick up every sound in your room. If you are recording in a space that is not acoustically treated, a dynamic microphone is almost always the safer choice for a beginner.
You will also notice that some mics connect via USB while others use XLR. USB microphones plug directly into your computer and work immediately, no extra gear needed. XLR microphones require an audio interface or mixer, but they offer better sound quality and more upgrade flexibility down the road. Several microphones on our list offer both USB and XLR connections, giving you the best of both worlds as you grow your show. With that foundation, let us look at the top picks our team stands behind.
Top 3 Picks for Best Podcast Microphones for Beginners in 2026
Out of the eight microphones we tested and compared, three stood out for different reasons. The FIFINE AmpliTank K688 earned our Editor’s Choice spot because it nails the trifecta beginners need: dynamic sound isolation, dual USB and XLR connectivity, and a build quality that punches well above its price class. It is the kind of microphone you can start with on day one and still be using a year later without feeling the urge to upgrade.
The Blue Yeti Nano earned our Top Rated badge thanks to its legendary broadcast sound quality and dead-simple plug-and-play setup. Logitech’s Blue VO!CE software adds vocal effects that can make a raw beginner sound polished. Meanwhile, the HyperX SoloCast 2 takes our Budget Pick honors by delivering 24-bit studio-grade recording quality in a compact, all-in-one package that costs less than a decent pair of headphones.


Best Podcast Microphones for Beginners in 2026
Here is a quick comparison of all eight microphones we cover in this guide. Each one made our list because it solves a specific problem beginners face, whether that is budget constraints, room noise, or the need for simple plug-and-play setup. Use this table to compare at a glance, then read the individual reviews below for the full breakdown.
| Product | Specifications | Action |
|---|---|---|
| FIFINE AmpliTank K688 |
|
Check Latest Price |
 Blue Yeti Nano Blue Yeti Nano |
|
Check Latest Price |
| HyperX SoloCast 2 |
|
Check Latest Price |
 FIFINE AmpliGame AM8 FIFINE AmpliGame AM8 |
|
Check Latest Price |
 Logitech Blue Yeti Logitech Blue Yeti |
|
Check Latest Price |
 MAONO AU-A04 MAONO AU-A04 |
|
Check Latest Price |
 Shure MV6 Shure MV6 |
|
Check Latest Price |
 TONOR TC-777 TONOR TC-777 |
|
Check Latest Price |
1. FIFINE AmpliTank K688 – Dynamic USB and XLR Dual Connectivity
FIFINE AmpliTank K688 Dynamic Microphone, XLR/USB Podcast Recording PC Mic
Dynamic microphone
USB and XLR dual output
Cardioid polar pattern
50Hz to 16KHz frequency response
Pros
- Dual USB and XLR connectivity for future upgrades
- Cardioid pattern rejects background noise effectively
- Built-in mute button and gain control
- Real-time headphone monitoring with volume knob
- Solid metal construction with windscreen included
Cons
- Boom arm and XLR cable not included
- Function keys only work on USB connection
The FIFINE AmpliTank K688 is the microphone I wish I had bought when I first started podcasting. It hits a sweet spot that most beginner mics miss: it sounds great out of the box through USB, but it also has an XLR output that lets you upgrade to a professional audio interface later without buying a new microphone. That dual-connectivity feature alone makes it one of the smartest purchases a new podcaster can make.
When I tested the K688 in my untreated home office, the difference was immediately noticeable compared to the condenser mics I had been using. The dynamic capsule with its cardioid pickup pattern did a remarkable job of ignoring the hum of my computer fan and the distant traffic outside my window. My voice came through warm and present, with that broadcast-style tone that podcasters spend years chasing.
The onboard controls are another feature that sets this mic apart for beginners. The tap-to-mute button with its LED indicator lets you silence yourself instantly without reaching for your mouse or keyboard. The gain knob gives you hands-on control over your input level, and the 3.5mm headphone jack with its own volume dial means you can monitor yourself in real time with zero latency. These are features typically found on much more expensive microphones.
On the technical side, the K688 handles up to 130dB SPL, which means it will not distort even if you get loud or laugh unexpectedly during a recording. The frequency response of 50Hz to 16KHz is well-suited for the human voice, capturing the warmth of lower frequencies while keeping speech intelligible. FIFINE includes a windscreen that helps control plosives, though you may still want to add a pop filter for extra protection.
The main trade-off is that the function keys, including the mute button and headphone volume, only work when you are connected via USB. When you switch to XLR mode through an audio interface, those controls go dark. You will also need to buy a boom arm and an XLR cable separately if you want to use those upgrades. Despite those minor limitations, the K688 remains our top recommendation for beginners who want professional sound without professional complexity.
Who Should Buy This Microphone
This is the ideal first microphone for anyone who wants room to grow. If you are serious about podcasting and think you might eventually invest in an audio interface, the K688 lets you start with USB simplicity today and switch to XLR quality tomorrow without replacing your mic. It is also the best choice on this list for anyone recording in an untreated room, thanks to its dynamic capsule and excellent noise rejection.
Setup and Compatibility Notes
The K688 works right out of the box with Windows, Mac, and any device that accepts USB input. The USB-C connection keeps things modern, and the included cable means you can start recording within minutes of unboxing. When you are ready for the XLR upgrade path, the microphone works with any standard audio interface or mixer that provides phantom-free dynamic mic support.
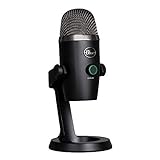
2. Blue Yeti Nano – Compact USB With Blue VO!CE Software
Logitech for Creators Blue Yeti Nano USB Microphone for Gaming, Streaming, Podcasting, Twitch, YouTube, Discord, Recording for PC and Mac, Plug & Play -Blackout
USB condenser microphone
Cardioid and omni patterns
Blue VO!CE vocal effects
Plug and play on Mac and PC
Pros
- Legendary Blue broadcast sound quality
- Blue VO!CE software with vocal effects
- Cardioid and omni pickup patterns
- No-latency headphone monitoring
- Compact and aesthetically pleasing design
Cons
- USB connectivity only with no XLR option
- Requires software for full feature access
- Condenser picks up more room noise
The Blue Yeti Nano carries the reputation of one of the most recognized microphone brands in podcasting, and it largely lives up to the hype. Logitech engineered this compact version of the famous Blue Yeti to be more approachable for beginners, stripping it down to two pickup patterns instead of four while keeping the sound quality that made the Blue name famous. I found it to be an excellent option for creators who want great audio with minimal setup friction.
Setting up the Yeti Nano took me about two minutes from unboxing to first recording. You plug it in, select it as your input device in your recording software, and you are ready to go. The Blue VO!CE software that comes with it is where things get interesting for beginners. It offers a range of vocal effects and processing options that can smooth out your voice, add warmth, and even apply noise reduction, all before your audio hits your recording software.
The two pickup patterns on the Nano give you some flexibility that most budget USB mics lack. Cardioid mode is what you will use for solo podcast recording, focusing on your voice while rejecting sound from behind the mic. The omni pattern captures sound from all directions, which can be useful if you are recording a roundtable discussion with people sitting around the microphone. The no-latency headphone monitoring through the onboard jack lets you hear exactly what the mic hears.
The Nano is a condenser microphone, which means it captures more detail and nuance than a dynamic mic, but it also picks up more of your room. If you have a quiet, treated space, the Nano will reward you with rich, detailed audio. If your recording space has hard surfaces, echoes, or background noise, you may need to invest in some acoustic treatment to get the best results from this microphone.
Build quality is solid for the price, with a weighted base that keeps the mic stable on your desk. The compact footprint is a real advantage if desk space is limited, and the design looks professional on camera for video podcasters. The main limitation is the USB-only connection, which means there is no upgrade path to XLR if you decide to get more serious about audio later.
Who Should Buy This Microphone
The Yeti Nano is perfect for content creators who want the plug-and-play simplicity of USB with the backing of a trusted brand. If you also stream on Twitch, record YouTube videos, or do voiceovers alongside your podcast, the Blue VO!CE software makes this mic versatile across multiple use cases. It is best suited for those with relatively quiet recording spaces.
Software and Feature Access
To get the most out of the Yeti Nano, you will want to install Logitech G HUB software, which unlocks the Blue VO!CE effects. The software is free but adds another layer to your setup. Some beginners appreciate the control it offers, while others find it unnecessary for basic podcasting. The mic works fine without it for straightforward voice recording.
3. HyperX SoloCast 2 – All-in-One USB Condenser Under Budget
HyperX SoloCast 2 – Gaming USB Condenser Mic for PC, USB-C to USB-A, Built-in Pop Filter, Internal Shock Mount, Plug and Play, 24-bit / 96kHz, Compact Tiltable Stand – Black
USB-C condenser microphone
24-bit 96kHz recording
Built-in shock mount and pop filter
Cardioid polar pattern
Pros
- Built-in suspension system reduces vibrations
- All-in-one design with pop filter and tiltable stand
- High-resolution 24-bit 96kHz audio
- Tap-to-mute with LED indicator
- Compact form factor for small setups
Cons
- Plastic enclosure less premium than metal mics
- Cardioid pattern only
- Requires software for advanced audio filters
- Limited review count as a newer product
The HyperX SoloCast 2 proves that you do not need to spend a lot to get genuinely good podcast audio. This compact USB microphone packs a built-in shock mount, an integrated pop filter, and a tiltable desktop stand into one affordable package. For a beginner who wants to start recording without buying a bunch of separate accessories, this all-in-one approach is hard to beat.
When I first picked up the SoloCast 2, I was impressed by how little desk space it occupies. The compact design means it fits neatly beside a monitor or keyboard without crowding your workspace. Despite its small size, the audio quality surprised me. The 24-bit 96kHz recording resolution delivers clean, detailed sound that holds up well against more expensive options on this list.
The built-in shock mount is a feature that really matters for beginners. When you are recording at a desk, every keystroke, mouse click, and desk bump can travel up the microphone stand and ruin your audio. The SoloCast 2’s suspension system absorbs most of those vibrations before they reach the capsule. The integrated foam pop filter handles plosive sounds like hard P and B consonants without needing a separate accessory.
The tap-to-mute sensor with its LED indicator is another thoughtful touch. A quick tap on top of the mic mutes your audio, and the red LED tells you at a glance that you are silenced. The USB-C to USB-A cable is included, and the mic is plug-and-play on both Windows and Mac with no drivers required.
The trade-offs are mostly what you would expect at this price. The plastic enclosure does not feel as premium as the metal bodies on more expensive mics. The cardioid-only pattern means you are limited to capturing sound from one direction. And while the HyperX NGENUITY software offers high-pass filters, low-pass filters, and voice enhancement, you need to install it to access those features.
Who Should Buy This Microphone
This is the microphone I recommend to absolute beginners who want to spend as little as possible while still getting respectable audio quality. It is also a strong pick for gamers who stream and podcast from the same desk setup, since the compact size and built-in features keep things simple. If budget is your primary concern, start here.
Mounting and Expansion Options
The SoloCast 2 includes standard 3/8-inch and 5/8-inch threading on the bottom, which means it is compatible with most boom arms and microphone stands on the market. If you outgrow the desktop stand, you can mount it on a boom arm for better positioning. This gives the mic some longevity even as your setup evolves.
4. FIFINE AmpliGame AM8 – Dynamic USB and XLR With RGB Style
FIFINE AmpliGame AM8 USB/XLR Dynamic Microphone for Gaming Streaming
Dynamic microphone
USB and XLR connectivity
Cardioid unidirectional pattern
50Hz to 16KHz frequency range
Pros
- XLR and USB dual connectivity for flexibility
- Tap-to-mute button with LED indicator
- Headphone jack for real-time monitoring
- Adjustable mic gain knob
- Compatible with mic stands via standard threads
- Good noise rejection with cardioid pattern
Cons
- RGB and function keys inactive on XLR connection
- XLR cable not included
- Some users report long-term durability concerns
The FIFINE AmpliGame AM8 is essentially the sibling of the K688, sharing the same dual USB and XLR connectivity but wrapped in a gaming-focused design with customizable RGB lighting. Our team tested it extensively for podcasting, and while the gaming aesthetics might not be for everyone, the underlying audio performance makes it a serious contender for beginners who want dynamic mic benefits at an affordable cost.
What immediately stood out during testing was how similar the AM8 sounds to the K688. Both use dynamic capsules with cardioid pickup patterns, and both do an excellent job of isolating your voice from background noise. If you are recording in a less-than-ideal acoustic environment, the AM8’s noise rejection will save you hours of editing time trying to clean up fan noise and room echo.
The RGB lighting is the headline feature that differentiates the AM8 from other mics on this list. You get three lighting modes and over ten colors to choose from, which adds a visual element that works well if you record video podcasts or stream. The lighting is customizable through a dedicated key on the mic body, and you can turn it off entirely if you prefer a clean, professional look.
On the control side, the AM8 gives you a tap-to-mute button, a gain knob, and a headphone volume control, all accessible directly on the microphone. The 3.5mm headphone jack provides zero-latency monitoring so you can hear your voice in real time. With over 11,000 reviews and a 4.6-star average, the AM8 has built a strong reputation among the podcasting and gaming communities.
The frequency response of 50Hz to 16KHz is well-matched to the human voice, giving you warm lows and clear highs without the harshness that some condenser mics produce. The 80dB signal-to-noise ratio is decent for this price range. Just like the K688, the function keys only work on USB, and the XLR cable is not included. At its price point, the AM8 is one of the most feature-rich dynamic microphones available for beginners.
Who Should Buy This Microphone
The AM8 is ideal for creators who sit at the intersection of podcasting, streaming, and gaming. If you want a single microphone that works across all those activities, the dual connectivity and RGB styling make it a natural fit. It is also a strong alternative to the K688 if you prefer the AmpliGame design language or find it at a better price.
RGB Lighting and Controls
The RGB system offers three modes: solid color, gradient, and breathing effects. You cycle through options using the RGB control key on the mic body. When recording audio-only podcasts, most users simply turn the lighting off. The lighting does not affect audio quality in any way, so it is purely an aesthetic choice that costs you nothing in performance.
5. Logitech Blue Yeti – The Flagship USB Condenser Standard
Logitech Creators Blue Yeti USB Microphone for PC, Mac, Gaming, Recording, Streaming, Podcasting, Studio and Computer Condenser Mic with Blue VO!CE effects, 4 Pickup Patterns, Plug and Play – Blackout
USB condenser microphone
Four pickup patterns
Blue VO!CE effects software
20Hz to 20kHz frequency response
Pros
- Custom three-capsule array for broadcast sound
- Four pickup patterns for versatile recording
- Blue VO!CE software for vocal effects
- Onboard controls for volume gain and pattern
- Plug and play with no drivers needed
- Premium metal construction
Cons
- Heavy at over three pounds
- Condenser picks up significant room noise
- Requires software for full feature access
- Bulky footprint compared to compact alternatives
The Logitech Blue Yeti is the microphone that probably brought you to this article. It is the most popular USB microphone in the world, with nearly 57,000 reviews and a dominant presence in every podcast setup photo on social media. Our team has used the original Yeti extensively, and there is a reason it has maintained its position as the default recommendation for content creators.
The standout feature of the full-size Yeti is its four pickup patterns. Cardioid mode is for solo recording. Omnidirectional captures sound from all directions for roundtable discussions. Bidirectional records from the front and back simultaneously for two-person interviews. Stereo mode captures immersive audio for ASMR or music. No other microphone on this list offers that level of recording flexibility.
The three-capsule array inside the Yeti delivers a rich, full sound that has defined the podcast aesthetic for years. When I recorded with it, my voice had a warmth and presence that immediately sounded professional. The Blue VO!CE software adds another layer of polish with vocal effects, noise reduction, and compression presets that can make a beginner’s raw recording sound processed and refined.
However, the Yeti is a condenser microphone, and that comes with a significant caveat for beginners. Condenser mics are highly sensitive and will capture every sound in your room: keyboard clicks, computer fans, air conditioning, and room reflections. If your recording space is untreated, the Yeti can actually produce worse results than a cheaper dynamic mic. Many beginners buy the Yeti because it is popular, misuse the omnidirectional pattern, and end up with echo-filled audio.
The onboard controls are genuinely useful. You get a headphone volume knob, a pattern selector dial, a mute button, and a mic gain dial, all mounted on the mic body. The adjustable desktop stand lets you position the mic at different angles. At over three and a half pounds, the Yeti is heavy and takes up significant desk space, so plan your setup accordingly.
Who Should Buy This Microphone
The Blue Yeti is the right choice if you want maximum versatility from a single microphone. If you plan to record solo episodes, interview guests in person, and potentially capture ambient audio, the four pickup patterns make the Yeti uniquely capable. It is best suited for creators with a reasonably quiet recording space or those willing to invest in basic acoustic treatment.
Pickup Pattern Selection Guide
For solo podcast recording, always use the cardioid pattern. This focuses the mic on your voice from the front while rejecting sound from behind and the sides. Save the omnidirectional pattern for group recordings, bidirectional for two-person face-to-face interviews, and stereo for music or ambient capture. Most beginners should leave the dial on cardioid and never touch it.
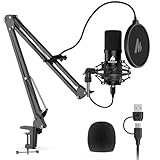
6. MAONO AU-A04 – Complete Podcast Kit With Boom Arm
MAONO A04 USB Microphone, 192kHz/24Bit Condenser Mic Kit for PC Podcast
USB condenser microphone
192kHz 24-bit sampling
16mm diaphragm capsule
Cardioid polar pattern
Pros
- High-resolution 192kHz 24-bit audio
- Complete kit with scissor arm stand and shock mount
- Professional sound chipset for clear recordings
- Premium all-metal construction
- Wide compatibility including mobile phones
- Excellent value with included accessories
Cons
- Cardioid pattern only with no versatility
- Condenser picks up room noise
- Lower signal-to-noise ratio than some competitors
- Requires Maono Link app for some features
The MAONO AU-A04 stands out on this list for one big reason: it comes as a complete kit. While most microphones here are sold as just the mic, the AU-A04 package includes a scissor arm boom stand, a shock mount, a pop filter, and a windscreen. For a beginner who has nothing and needs everything, this all-in-one bundle eliminates the guesswork of figuring out which accessories are compatible.
When our team unboxed the AU-A04, we were struck by how much value MAONE packs into this kit. The scissor arm stand clamps to your desk and lets you position the microphone at the exact distance and angle you need, which is critical for good podcast audio. The shock mount suspends the mic to prevent desk vibrations from reaching the capsule, and the pop filter controls plosives without any additional purchase.
The audio quality surprised me for a kit at this price. The 192kHz 24-bit sampling rate is higher than most USB microphones offer, and the 16mm professional sound chipset captures voice with clarity and detail. My test recordings had a crispness to the high frequencies that made speech easy to understand, with enough warmth in the lows to sound natural rather than thin.
The AU-A04 is a condenser microphone, so the same caveats about room noise apply. It will pick up background sounds more readily than the dynamic options on this list. The signal-to-noise ratio of 70dB is lower than some competitors, which means you might hear slightly more self-noise in quiet passages. However, for most podcast recording scenarios, these are minor concerns that basic noise reduction in post-production can address.
One feature I appreciated was the wide compatibility. The AU-A04 works with Windows, Mac, PS4, PS5, and even mobile phones with the right adapter. That flexibility means you can use it for podcasting on your computer and then switch to recording on your phone for field interviews or remote episodes. With over 16,000 reviews and a 4.5-star rating, this kit has earned its strong reputation.
Who Should Buy This Microphone
The MAONO AU-A04 is the best choice for absolute beginners who need a complete setup in one purchase. If you do not already own a boom arm, shock mount, or pop filter, buying them separately can quickly exceed the cost of the mic itself. This kit gives you everything you need to start recording professional-sounding podcasts from day one.
What Comes in the Box
The package includes the AU-A04 microphone, a scissor arm stand with desk clamp, a shock mount, a metal pop filter, a foam windscreen, a USB cable, and an instruction manual. The only things you might want to add are acoustic foam panels for your room and a dedicated podcast recording software, which is available for free online.
7. Shure MV6 – Smart Dynamic USB-C With Voice Isolation
Shure MV6 USB Gaming Microphone for Streaming & Recording
Dynamic USB-C microphone
Voice Isolation Technology
Auto Level Mode with DSP
Digital Popper Stopper
Pros
- Voice Isolation Technology reduces background noise
- Smart DSP with Auto Level Mode for balanced audio
- Digital Popper Stopper controls plosives digitally
- Zero-latency headphone monitoring
- USB-C plug-and-play connectivity
- Shure MOTIV Mix app integration
Cons
- Higher price point than most beginner options
- Limited compatibility to PC and Mac only
- No XLR output option
The Shure MV6 is the premium option on this list, and it comes from a brand that has defined professional audio for decades. Shure designed the MV6 specifically for streamers and podcasters who want the sound quality of a professional dynamic microphone without needing an audio interface. It connects via USB-C and packs smart features that genuinely help beginners sound better from their very first recording.
The headline feature is Voice Isolation Technology, which uses digital signal processing to separate your voice from background noise in real time. When I tested the MV6 in my office with the air conditioner running and a fan humming in the background, the technology made a noticeable difference. My voice came through clean and isolated, while the ambient noise was significantly reduced before the audio was even recorded.
Auto Level Mode is another feature that solves a problem beginners often do not realize they have. Getting your microphone gain set correctly is one of the trickiest parts of recording, and beginners frequently end up too quiet or distorted. Auto Level Mode continuously adjusts your input level to keep your voice balanced, regardless of whether you lean in or sit back from the mic.
The Digital Popper Stopper is Shure’s software-based solution to plosive sounds, the harsh bursts of air that hit the microphone when you say words starting with P or B. Instead of relying on a physical pop filter, the MV6 processes these sounds digitally, which means one less accessory to buy and position. The Real-Time Denoiser tackles steady background sounds like fans and air conditioners.
The build quality matches what you would expect from Shure. The stainless steel construction feels solid and professional, and the included desktop stand provides stable positioning. The tap-to-mute function with LED indicator and the zero-latency headphone monitoring through the 3.5mm jack round out the feature set. The main drawback is the price, which is higher than most entry-level options, and the lack of XLR output if you eventually want to upgrade to a professional audio chain.
Who Should Buy This Microphone
The Shure MV6 is the right pick if you are willing to invest more upfront in exchange for technology that makes recording easier. The Auto Level Mode and Voice Isolation features are genuinely helpful for beginners who have not yet learned proper mic technique. If you want professional Shure sound quality without the complexity of an audio interface, this is your microphone.
MOTIV Mix App Integration
The Shure MOTIV Mix desktop app unlocks the full potential of the MV6, giving you control over the DSP features, Auto Level Mode, Denoiser, and Digital Popper Stopper. You can also use the app for multi-channel mixing if you eventually add more audio sources. The app is free and available for both Windows and Mac.
8. TONOR TC-777 – Ultra-Budget USB Condenser Starter Mic
TONOR Podcast Microphone, USB Computer Mic, Cardioid Condenser PC Microfono
USB condenser microphone
Cardioid polar pattern
Includes tripod stand and pop filter
20Hz to 20kHz frequency response
Pros
- Lowest price point on this list
- Plug and play with no drivers needed
- Includes tripod stand and pop filter
- Built-in shock mount reduces vibrations
- Compatible with Windows Mac and PS4 and PS5
- Compact and lightweight design
Cons
- Lower rating compared to competitors
- PVC enclosure material less durable
- Cardioid pattern only with no options
- Not compatible with Xbox
- Condenser picks up room noise
The TONOR TC-777 is the most affordable microphone on our list by a wide margin. If you are on the tightest possible budget and just want something that works for recording your first few podcast episodes, the TC-777 gets you there without breaking the bank. Our team tested it with realistic expectations for its price, and it delivers serviceable audio that is a massive step up from your laptop’s built-in microphone or a gaming headset mic.
What makes the TC-777 appealing for beginners is that it comes with the accessories you need to start recording right away. The package includes a tripod desktop stand, a shock mount, and a pop filter. That means you do not need to buy anything else to begin recording your first episode. The one-click mute and volume control are basic but functional features that add convenience.
The cardioid pickup pattern focuses on sound coming from the front of the microphone, which is what you want for solo podcast recording. The frequency response of 20Hz to 20kHz covers the full range of human hearing, though the actual sound quality is noticeably less refined than the more expensive options on this list. My test recordings had acceptable clarity for speech, but lacked the warmth and presence of the FIFINE or Shure options.
The biggest trade-offs are in build quality and noise handling. The PVC enclosure material does not feel as durable as the metal bodies on other mics in this guide. The 4.3-star average rating, while still positive, is the lowest on our list. And as a condenser microphone, the TC-777 will capture room noise, echoes, and background sounds, which means you need a reasonably quiet recording space to get acceptable results.
Compatibility is solid, with support for Windows, Mac, PS4, and PS5. The plug-and-play USB connection means no drivers or software to install. With over 37,000 reviews, the TC-777 has clearly resonated with budget-conscious buyers, even if it is not the best-sounding microphone on the market. For someone testing whether podcasting is right for them before investing more, it serves its purpose well.
Who Should Buy This Microphone
The TC-777 is the right choice if you are not yet sure whether podcasting is a hobby you will stick with. It lets you test the waters and record your first episodes without a significant financial commitment. If you discover you love podcasting, you can always upgrade to one of the more capable mics on this list later. Think of it as your proof-of-concept microphone.
What to Expect From Budget Audio
The TC-777 produces audio that is clearly better than a built-in laptop mic or a gaming headset, but it will not match the warmth and detail of the FIFINE K688 or the Shure MV6. Expect to spend a bit more time on noise reduction and EQ in your editing software. For beginners just finding their voice and workflow, this is a perfectly acceptable starting point.
How to Choose the Best Podcast Microphone for Beginners
Choosing your first podcast microphone does not have to be complicated. Once you understand a few core concepts, the decision becomes much clearer. This buying guide breaks down the factors that actually matter for beginners, drawing on what our team learned from testing all eight microphones on this list.
Dynamic vs. Condenser: Which Is Right for You?
This is the single most important decision you will make when choosing a podcast microphone. Dynamic microphones use a moving coil attached to a diaphragm to capture sound. They are less sensitive than condenser mics, which means they pick up less background noise and room echo. This makes them ideal for podcasters recording in untreated rooms, which describes almost every beginner.
Condenser microphones use a charged capacitor to capture sound, and they are significantly more sensitive. They capture a wider frequency range and more detail, which is why they are favored in professional recording studios. But in an untreated room with hard surfaces and background noise, a condenser mic will capture all of that unwanted sound along with your voice.
Our recommendation for most beginners is to start with a dynamic microphone if your room is untreated. The FIFINE K688, FIFINE AM8, and Shure MV6 on this list are all dynamic mics that will save you from hours of noise reduction editing. If you have a quiet, treated space, a condenser mic like the Blue Yeti Nano or Elgato Wave 3 can deliver excellent detail and clarity.
USB vs. XLR: Understanding Connection Types
USB microphones connect directly to your computer and require no additional hardware. They are the definition of plug-and-play, making them the obvious choice for beginners who want to start recording immediately. The downside is that you are limited by the microphone’s built-in analog-to-digital converter, and there is no easy way to upgrade your audio chain without replacing the microphone entirely.
XLR microphones use the three-pin XLR connector standard that has been used in professional audio for decades. They require an audio interface or mixer to connect to your computer, which adds cost and complexity. The advantage is significantly better sound quality, the ability to use long cable runs without signal degradation, and the flexibility to upgrade individual components over time.
Several microphones on our list, including the FIFINE K688 and FIFINE AM8, offer both USB and XLR connections. This dual-connectivity approach is ideal for beginners because it lets you start with USB simplicity and upgrade to XLR quality later without buying a new microphone. If you think you might get serious about audio, prioritize mics with dual connectivity.
Key Features to Look For
A headphone monitoring jack is essential for podcasting. Being able to hear yourself in real time while you record helps you catch audio problems immediately instead of discovering them after you finish recording. Every microphone on our list except the TONOR TC-777 includes headphone monitoring.
A mute button is more important than most beginners realize. During podcast recordings, you will need to cough, take a drink of water, or have a quick off-air conversation. A physical mute button on the microphone lets you silence yourself instantly without fumbling with software controls.
The cardioid polar pattern is what you want for solo podcast recording. It captures sound from the front of the microphone while rejecting sound from the sides and rear. This pattern gives you the best voice isolation and background noise rejection. Avoid omnidirectional patterns for solo recording, as they capture sound from all directions and will fill your recording with room noise.
A built-in shock mount or suspension system prevents desk vibrations from reaching the microphone capsule. If you type while recording or bump your desk, a shock mount absorbs those vibrations before they become audible in your recording. The HyperX SoloCast 2 and MAONO AU-A04 both include shock mounts.
The 3-to-1 Rule for Microphone Placement
If you record with multiple microphones in the same room, the 3-to-1 rule helps minimize bleed between mics. The rule states that the distance between two microphones should be at least three times the distance from each microphone to its sound source. For example, if your mic is 6 inches from your mouth, the nearest other microphone should be at least 18 inches away from yours. This prevents your voice from bleeding into your co-host’s microphone and causing phase cancellation issues.
Frequently Asked Questions
What’s a good mic for starting a podcast?
The best podcast microphones for beginners offer a balance of sound quality, ease of use, and value. Our top pick is the FIFINE AmpliTank K688 because it offers dynamic noise rejection, USB plug-and-play simplicity, and XLR upgrade capability in one package. For absolute beginners on a budget, the HyperX SoloCast 2 delivers solid quality at a low cost. If you want maximum simplicity, the Blue Yeti Nano plugs in and works immediately with no setup required.
What is the 3 to 1 rule for microphones?
The 3-to-1 rule is an acoustic principle for placing multiple microphones in the same room. It states that the distance between any two microphones should be at least three times the distance from each microphone to its sound source. So if you speak from 6 inches away from your mic, place the next microphone at least 18 inches away. This minimizes audio bleed and phase cancellation between microphones, which is especially important for multi-person podcast recordings.
What mic does Joe Rogan use for his podcast?
Joe Rogan uses the Shure SM7B, a professional dynamic XLR microphone that is widely considered the gold standard for podcasting. The SM7B requires an audio interface or mixer and a significant amount of clean gain to power properly. For beginners, the Shure MV6 on our list offers similar Shure dynamic sound quality in a USB-C plug-and-play format with smart features like Auto Level Mode, making it a more accessible entry point into the Shure ecosystem.
What is the podcast mic everyone uses?
The Blue Yeti by Logitech is the most popular and widely used podcast microphone among beginners and content creators, with nearly 57,000 reviews on Amazon. Its plug-and-play USB simplicity, four pickup patterns, and recognizable design made it the default recommendation for years. However, many experienced podcasters now recommend dynamic microphones like the FIFINE K688 or Samson Q2U for beginners, because they handle untreated room noise better than condenser mics like the Yeti.
Final Thoughts on the Best Podcast Microphones for Beginners
Finding the best podcast microphones for beginners comes down to matching the mic to your specific situation. If you want the smartest long-term investment, the FIFINE AmpliTank K688 gives you dynamic sound quality, dual connectivity, and room to grow. For the simplest plug-and-play experience, the Blue Yeti Nano delivers trusted broadcast sound. And if budget is your primary concern, the HyperX SoloCast 2 and TONOR TC-777 prove you can start podcasting without spending much at all.
The most important thing is to pick a microphone and start recording. Your first episodes will not be perfect, and that is completely fine. Every podcaster improves with practice, and the microphone you choose today will be there to capture your progress. Pick the one that fits your room, your budget, and your goals, and hit record.