
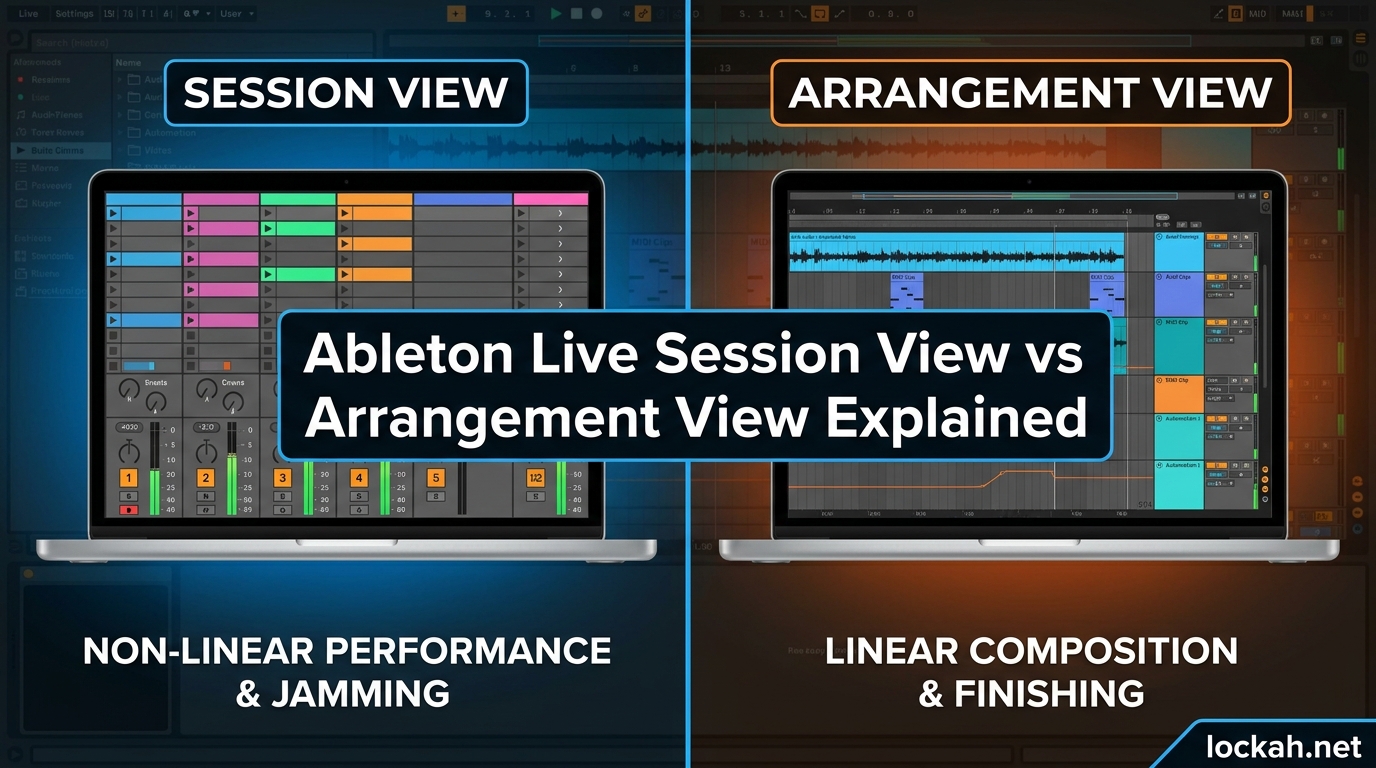
Opening Ableton Live for the first time can feel like stepping into unfamiliar territory. That grid of empty squares staring back at you is Session View, and it confuses almost every new user I have talked to. Most people panic and immediately switch to Arrangement View because it looks like a normal timeline, something they recognize from other DAWs.
Here is the truth: both views serve completely different purposes, and understanding when to use each one will transform how you make music. In this guide, I will explain Ableton Live Session View vs Arrangement View in plain terms, show you how to move between them, and share the workflow that actually gets tracks finished.
By the end, you will know exactly why Session View exists, when Arrangement View shines, and how to combine both for a production workflow that works.
Table of Contents
What Is Session View in Ableton Live?
Session View is a non-linear clip grid designed for improvisation, experimentation, and capturing ideas quickly. Instead of a traditional timeline that plays left to right, Session View organizes your music vertically in a grid of clip slots.
Each horizontal row in the grid is called a scene, and each vertical column represents an instrument or audio track. Within each cell of this grid, you can place individual clips, which are short segments of audio or MIDI data. These clips can be loops, one-shots, basslines, drum patterns, or any musical idea you want to store.
The power of Session View comes from its launch-based workflow. You can trigger any clip at any time by clicking its launch button or using a MIDI controller. This means you can jump between different ideas instantly, try combinations on the fly, and build songs through performance rather than traditional sequencing. It is the reason Ableton dominates live electronic music performance.
Scenes add another layer of organization. When you trigger a scene, every clip in that horizontal row starts playing simultaneously. This lets you arrange entire song sections, intro, verse, chorus, and switch between them with a single click or button press. Many producers use scenes to sketch out song structures before committing anything to a timeline.
Session View also includes Follow Actions, which let clips trigger other clips automatically after they finish playing. This creates self-running sequences and generative music possibilities that would be tedious to program on a traditional timeline. You can set clips to play the next clip, a random clip, or loop a specific number of times before moving on.
What Is Arrangement View in Ableton Live?
Arrangement View is Ableton’s linear timeline, the traditional DAW layout where time flows from left to right. If you have used any other music software, this view will feel familiar immediately. It is where songs get structured, arranged, and finished.
In Arrangement View, your tracks run horizontally across the screen with a timeline ruler at the top showing bars, beats, and minutes. Clips sit on this timeline in specific positions, and the playhead moves steadily from left to right, playing whatever it encounters. This linear approach is perfect for building song structures, adding transitions, and fine-tuning details.
The Arrangement View timeline supports detailed automation. You can draw in volume changes, filter sweeps, and effect parameters with precision. Unlike Session View where automation is clip-based, Arrangement View offers track-based automation lanes that span the entire timeline, giving you more control over how sounds evolve across your song.
This view is also where you will do most of your mixing and mastering work. The arrangement provides a complete overview of your track from start to finish, making it easy to see how elements interact over time. When you are ready to export your final song, Arrangement View is where that happens.
Many producers, especially those coming from other DAWs, spend all their time in Arrangement View. It feels safe and predictable. But staying exclusively in this view means missing out on the creative possibilities that make Ableton unique.
Session View vs Arrangement View: Key Differences (2026)
Understanding the core differences between these views helps you choose the right tool for each stage of production. Here is a direct comparison:
| Feature | Session View | Arrangement View |
|---|---|---|
| Layout | Vertical clip grid | Horizontal timeline |
| Playback | Non-linear, clip-based | Linear, left to right |
| Best For | Ideas, jamming, live performance | Structure, arrangement, finishing |
| Clip Triggering | Manual or scene-based | Fixed timeline position |
| Organization | Scenes and clip slots | Track lanes and time positions |
| Automation | Clip envelopes | Track automation lanes |
| Recording | Clip-based capture | Linear track recording |
The fundamental difference is workflow philosophy. Session View encourages exploration and happy accidents. Arrangement View rewards planning and precision. Both are essential for a complete production process.
How to Switch Between Session View and Arrangement View?
Switching between views is incredibly simple, which makes it easy to integrate both into your workflow.
The fastest method is pressing the Tab key on your keyboard. This instantly toggles between Session and Arrangement Views. I use this shortcut dozens of times per session without thinking about it. Once muscle memory kicks in, view switching becomes automatic.
You can also click the view selector buttons in the top-right corner of the screen. Look for two small icons: one showing a grid pattern for Session View and one showing horizontal lines for Arrangement View. These buttons do the same thing as the Tab key but require a mouse click.
Ableton sometimes switches views automatically. When you press the Global Record button in Session View, Ableton may switch to Arrangement View depending on your preferences. Similarly, double-clicking a clip in Session View opens the Clip View, which is the same in both modes.
Both views share the same set of tracks and clips. You are not opening different projects; you are simply looking at the same material from different angles. This seamless integration is one of Ableton’s greatest strengths.
How to Move Clips Between Session View and Arrangement View?
Moving ideas between views is where the magic happens. You will constantly shift material from Session View, where ideas are born, to Arrangement View, where songs take shape.
Method 1: Drag and Drop
The simplest way is dragging clips directly from Session View to Arrangement View. Select the clips you want to move, then drag them onto the Arrangement timeline. Ableton will place them at the exact time position where you release the mouse.
You can drag entire scenes at once by clicking the scene launch button and dragging it to the Arrangement. This brings across all clips in that row simultaneously, preserving their relative timing.
Method 2: Copy and Paste
Select clips in Session View, press Ctrl+C (Cmd+C on Mac), switch to Arrangement View with Tab, then paste at your desired position with Ctrl+V (Cmd+V). This works well for precise placement.
Method 3: Recording Session to Arrangement
This is the most powerful workflow. Press the Global Record button in Session View, then launch clips and scenes in real-time. Ableton records your performance directly into Arrangement View, capturing the exact timing of every clip trigger. This preserves the feel of a live performance while creating a linear arrangement you can edit later.
Many producers build entire tracks this way. They load up Session View with loops and sounds, hit record, and perform their arrangement live. The result is a natural-sounding track with human timing variations that would be difficult to program manually.
Method 4: Consolidating to Audio
For a different approach, you can consolidate Session View clips into audio and import them into Arrangement View. Select a clip or multiple clips, right-click, and choose Consolidate. This renders them to a new audio file that you can then drag to Arrangement View.
The Back to Arrangement Button Explained (2026)
Here is where many beginners get confused. The Back to Arrangement button sits in the control bar and only lights up under specific conditions. Understanding what it does will save you hours of frustration.
When you launch clips in Session View while Arrangement View is playing, Ableton switches from playing the arrangement to playing the Session clips. The arrangement keeps running in the background, but you hear the Session clips instead. This is how live performers improvise over backing tracks.
The Back to Arrangement button lights up orange when this happens. It is telling you that the arrangement is still there, waiting to resume. Clicking it returns playback to the Arrangement timeline from the current playhead position.
Many new users think this button switches views. It does not. It only affects which audio source is playing. You can be looking at Arrangement View while Session clips are playing, and clicking Back to Arrangement will make the arrangement audible again.
Here is a common scenario: you are working in Arrangement View, accidentally click a clip in Session View, and suddenly your arrangement stops playing. The Back to Arrangement button lights up. Click it, and your arrangement resumes from where it left off.
If you want to prevent accidental Session launches from interrupting your arrangement, you can turn off the orange track arm buttons next to each track header. When these are off, Session clips will not override the arrangement on that track.
When to Use Session View
Session View excels at specific stages of the creative process. Here is when I reach for it:
Brainstorming and Idea Generation: Load up instruments and samples, then jam without committing to anything. Try different combinations quickly. The non-linear layout encourages experimentation.
Sound Design: Test synth patches, effect chains, and samples in isolation. Tweak parameters while the clip loops, then save the results.
Live Performance: DJs and live electronic musicians rely on Session View for real-time remixing. Trigger loops, effects, and transitions on the fly.
Beat Battles and Competitions: When time is limited and you need to build a beat quickly, Session View lets you work fast. Many battle producers work almost exclusively in this view.
Sketching Song Structures: Use scenes to map out intro, verse, chorus, and breakdown sections. Rearrange song parts by dragging scenes, not individual clips.
Session View is your creative sandbox. It is where you play, experiment, and discover.
When to Use Arrangement View
Arrangement View takes over when it is time to finish things. Here is where it shines:
Structuring Songs: Arrange your sections in a linear order. Add intros, buildups, drops, and outros with precise timing.
Detailed Automation: Draw in filter sweeps, volume rides, and effect changes that span multiple sections. The automation lanes give you pixel-perfect control.
Editing and Comping: Fine-tune recordings, fix timing issues, and compile the best takes from multiple recordings.
Mixing: See your entire song at once. Adjust levels, panning, and effects across the full timeline. Solo and mute tracks to focus on specific elements.
Exporting Final Tracks: Render your finished song to audio. Set loop points, check levels, and export in your desired format.
Think of Arrangement View as your assembly line. It is where rough ideas become polished tracks.
The Hybrid Workflow That Actually Gets Tracks Finished
After years of producing in Ableton, I have settled on a hybrid workflow that leverages both views at different stages. This approach has helped me finish more tracks than any single-view method.
Stage 1: Idea Capture in Session View
Start with a blank Session View. Load a drum rack, a bass synth, and a couple of melodic instruments. Jam for 15 to 30 minutes, recording clips as you go. Do not worry about song structure yet. Just collect ideas.
Use scenes to organize your clips into rough groups: drums, bass, chords, leads. Launch different combinations to see what works together. This is the exploration phase.
Stage 2: Sketch the Structure
Once you have 8 to 12 clips that work together, arrange them into scenes representing song sections. Scene 1 might be drums only, Scene 2 adds bass, Scene 3 brings in chords, and so on. Play through the scenes to test the flow.
Stage 3: Record to Arrangement
Switch to Arrangement View and enable Global Record. Perform your scene launches in real-time, building the song structure as you go. This captures the timing and feel of a live performance.
Stage 4: Refine in Arrangement View
Now you have a rough arrangement on the timeline. Mute clips, add transitions, draw automation, and fine-tune the mix. This is where the track becomes finished.
The key is knowing when to switch views. Many producers get stuck because they try to do everything in one view. Session View is for starting. Arrangement View is for finishing. Master the handoff between them, and your productivity will increase dramatically.
Essential Keyboard Shortcuts for Both Views
Learning these shortcuts will speed up your workflow significantly:
View Switching:
- Tab: Switch between Session and Arrangement Views
Session View Shortcuts:
- Space: Start/stop playback
- F9: Record into selected clip slot
- F10: Launch selected scene
- F11: Stop all clips
- F12: Launch selected clip
- Shift + Arrow Keys: Move between clip slots
- Ctrl/Cmd + E: Split clip at selection
Arrangement View Shortcuts:
- Space: Start/stop playback
- F9: Toggle record
- 0: Return playhead to start
- Shift + Tab: Show/hide browser
- Ctrl/Cmd + D: Duplicate selection
- Ctrl/Cmd + I: Insert time
- Ctrl/Cmd + Shift + Delete: Delete time
Universal Shortcuts:
- Ctrl/Cmd + Z: Undo
- Ctrl/Cmd + Shift + Z: Redo
- Ctrl/Cmd + S: Save
- Ctrl/Cmd + N: New Live Set
- Ctrl/Cmd + O: Open Live Set
These shortcuts work in both views, making navigation seamless once you memorize them.
Frequently Asked Questions
What is the difference between Session View and Arrangement View in Ableton?
Session View is a non-linear clip grid for improvisation and live performance, while Arrangement View is a linear timeline for structuring and finishing songs. Session View lets you trigger clips in any order; Arrangement View plays left to right like a traditional DAW.
What is the point of Session View in Ableton?
Session View exists for experimentation, improvisation, and capturing ideas quickly. It allows you to try different musical combinations on the fly, perform live, and organize ideas into scenes before committing them to a fixed arrangement. Many producers consider it Ableton’s defining feature.
How do I move from Session View to Arrangement View?
Press the Tab key to switch instantly between views. You can also click the view selector buttons in the top-right corner. To move clips, drag them from Session View to the Arrangement timeline, or record your Session View performance directly into Arrangement View using the Global Record button.
Should beginners learn Session View or stick to Arrangement View?
Beginners should learn both, but starting with Arrangement View is less intimidating since it resembles other DAWs. However, avoiding Session View means missing out on Ableton’s most powerful feature. Spend time in both views from the beginning to develop a complete understanding.
Why does my arrangement stop playing when I click a Session clip?
This happens because Session clips take priority over the arrangement when launched. The Back to Arrangement button lights up orange to indicate this. Click it to resume the arrangement, or disable the orange track arm buttons to prevent Session clips from interrupting specific tracks.
Conclusion
Understanding Ableton Live Session View vs Arrangement View is fundamental to mastering this DAW. Session View is your creative playground for ideas and experimentation. Arrangement View is your workshop for finishing tracks. Neither is better than the other; they serve different stages of the production process.
The producers who finish the most tracks are not the ones who know every feature. They are the ones who have developed a clear workflow for moving from ideas to finished songs. Start in Session View, sketch your structure with scenes, record to Arrangement, then refine and export.
Press Tab, explore both views, and find the workflow that works for your music. The grid is not as intimidating as it looks once you understand what it can do.